As for the old version, I am still going to keep her. I'm going to make her into a different OC so I have a spare mask in case somebody wants to try kig.
The new process seems to work well. The only problems I had were minor and will be easy to fix on the next mask I make. As far as I'm concerned, it's the best process used to make kig masks so far. The only major issue is the higher cost of UV resin compared to filament. Since I am reusing segments that reduces the cost per mask a bit so it isn't all that much more than the old process for most masks. If it weren't for the fact that it's more expensive to buy UV resin in Canada (there is only one Canadian seller and they price in USD at a significantly higher price than some American sellers, meaning it is cheaper to order from the US), the price for me would probably be more or less the same for the average custom mask. For generics and semi-customs the price is pretty much the same or slightly less since little or no new printing is required. Using polyester FRP resin instead of epoxy could also make it cheaper, but it produces nasty fumes, is less durable, and shrinks more, so I am sticking with epoxy FRP resin.

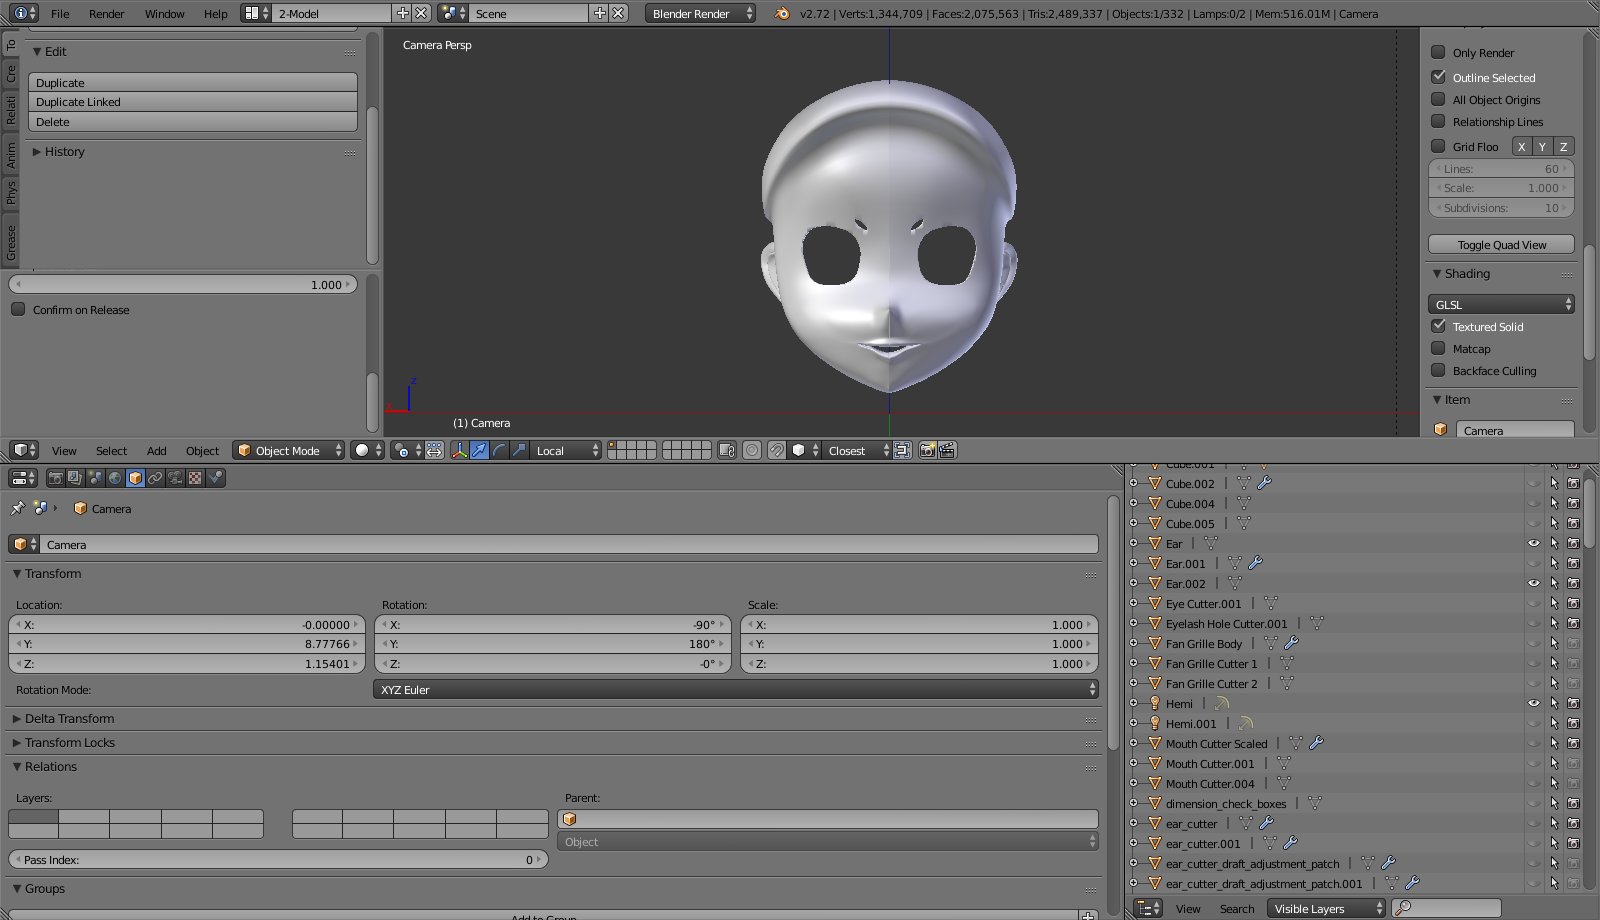


A preview of the final cast shell generated in Blender


The completed mold in Blender, ready for printing. The eye sockets and parting lines are generated by using the solidify modifier to generate copies of different thicknesses and using booleans to cut out various parts of them, as well as for joining them to the base shell of the mold.


The SLA printer with some segments printing. It uses a projector to cure light-sensitive resin at the bottom of a vat, and the print is attached to a build plate that is pulled out of the vat a layer at a time. Unlike the FDM (extrusion) printers I used for making masks before, it prints an entire layer at once.

The finished printed mold. The parting lines get filled in with clay (I ended up making extra work for myself because I left some excess clay on the inside, which meant I had to do a lot more sanding and filling on the cast shell than would have otherwise been necessary; next time I am going to make sure that that doesn't happen), and the inside gets coated with wax and PVA mold release. Demolding is relatively easy because the segments are small. I originally thought I would have to fiberglass the outside of the segments, but it doesn't seem to be necessary most of the time (the one ended up breaking before I assembled the mold because I was experimenting with different thicknesses and made the wall too thin, so I fiberglassed it to make sure it wouldn't break again).

The cast shell. I forgot to take any pictures between when I cast her and when I cut away the excess material.


Primed and painted


Complete (except for the eyes; I reused the old ones, and really should make new ones that are attached with vinyl rather than hot glue, and have the pupils cut out differently)


Tried her on right after I finished her. Overall I'd say she turned out pretty decently (I could maybe have moved the eyes a tad further apart, and moved the forehead out a bit more, but most people probably won't notice)
I also finished assembling Sayaka. Cici is going to be finishing her, so I will ship her out as soon as possible. Sayaka is the last extrusion printed mask commission for me, seeing as the new process works well. I am still going to reprint parts of Homura since I am not completely satisfied with how she turned out, so I'm not quite done with extrusion printing of mask segments just yet.


No comments:
Post a Comment